기타 기능
이 페이지에는 유용하게 사용할 수 있는 다른 모든 가용한 기능이 나열되어 있습니다.
전역 프리픽스#
setGlobalPrefix()를 통해 설정된 경로의 전역 프리픽스를 무시하려면 ignoreGlobalPrefix를 사용하세요:
const document = SwaggerModule.createDocument(app, options, {
  ignoreGlobalPrefix: true,
});
전역 파라미터#
아래와 같이 DocumentBuilder를 사용하여 모든 경로에 대한 파라미터를 정의할 수 있습니다:
const config = new DocumentBuilder()
  .addGlobalParameters({
    name: 'tenantId',
    in: 'header',
  })
  // other configurations
  .build();
전역 응답#
DocumentBuilder를 사용하여 모든 경로에 대한 전역 응답을 정의할 수 있습니다. 이는 401 Unauthorized 또는 500 Internal Server Error와 같은 오류 코드를 포함하여 애플리케이션의 모든 엔드포인트에서 일관된 응답을 설정하는 데 유용합니다.
const config = new DocumentBuilder()
  .addGlobalResponse({
    status: 500,
    description: 'Internal server error',
  })
  // other configurations
  .build();
다중 스펙#
SwaggerModule은 다중 스펙을 지원하는 방법을 제공합니다. 즉, 서로 다른 UI를 가진 다른 문서를 다른 엔드포인트에서 제공할 수 있습니다.
다중 스펙을 지원하려면 애플리케이션이 모듈화된 접근 방식으로 작성되어야 합니다. createDocument() 메서드는 extraOptions라는 세 번째 인수를 받는데, 이는 include라는 속성을 가진 객체입니다. include 속성은 모듈 배열을 값으로 가집니다.
아래와 같이 다중 스펙 지원을 설정할 수 있습니다:
import { NestFactory } from '@nestjs/core';
import { SwaggerModule, DocumentBuilder } from '@nestjs/swagger';
import { AppModule } from './app.module';
import { CatsModule } from './cats/cats.module';
import { DogsModule } from './dogs/dogs.module';

async function bootstrap() {
  const app = await NestFactory.create(AppModule);

  /**
   * createDocument(application, configurationOptions, extraOptions);
   *
   * createDocument 메서드는 선택적 세 번째 인수인 "extraOptions"를 받습니다.
   * 이는 "include" 속성을 가진 객체이며, 해당 Swagger 스펙에 포함시키려는
   * 모듈의 배열을 전달할 수 있습니다.
   * 예: CatsModule과 DogsModule은 두 개의 별도 Swagger 스펙을 가질 것이며, 이는
   * 두 개의 다른 엔드포인트에서 두 개의 다른 SwaggerUI로 노출될 것입니다.
   */

  const options = new DocumentBuilder()
    .setTitle('Cats example')
    .setDescription('The cats API description')
    .setVersion('1.0')
    .addTag('cats')
    .build();

  const catDocumentFactory = () =>
    SwaggerModule.createDocument(app, options, {
      include: [CatsModule],
    });
  SwaggerModule.setup('api/cats', app, catDocumentFactory);

  const secondOptions = new DocumentBuilder()
    .setTitle('Dogs example')
    .setDescription('The dogs API description')
    .setVersion('1.0')
    .addTag('dogs')
    .build();

  const dogDocumentFactory = () =>
    SwaggerModule.createDocument(app, secondOptions, {
      include: [DogsModule],
    });
  SwaggerModule.setup('api/dogs', app, dogDocumentFactory);

  await app.listen(process.env.PORT ?? 3000);
}
bootstrap();
이제 다음 명령으로 서버를 시작할 수 있습니다:
$ npm run start
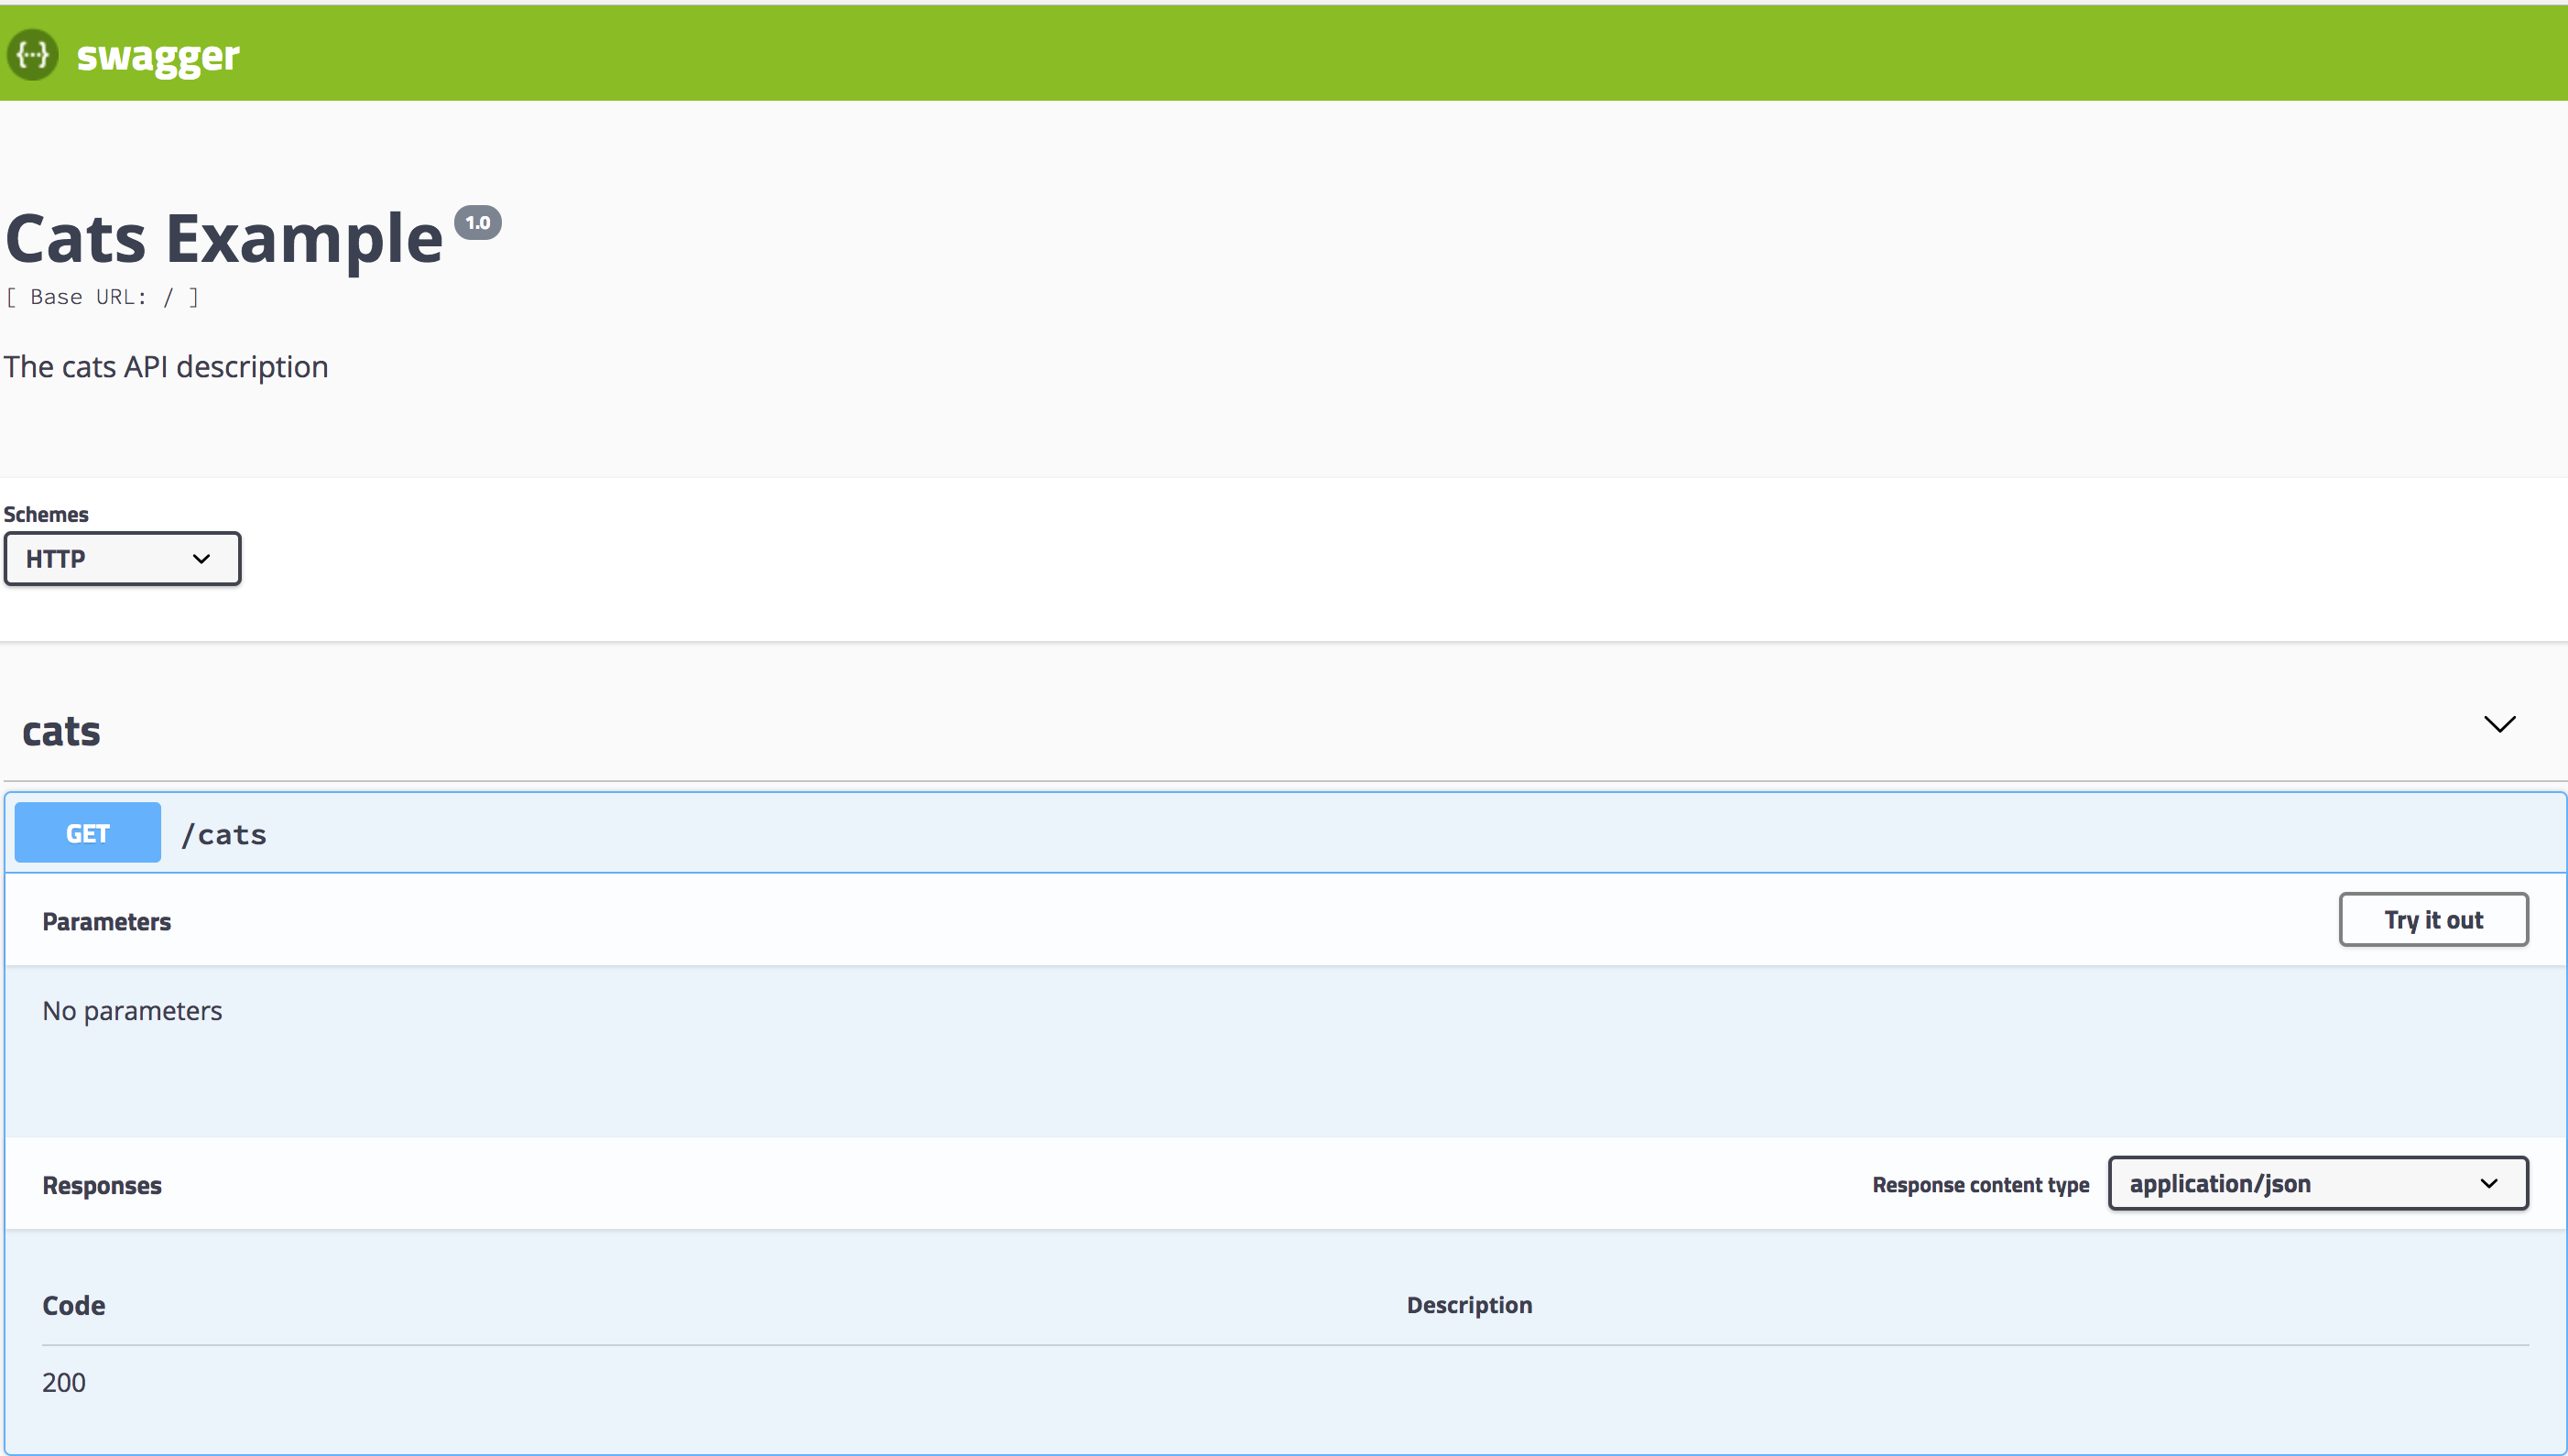
http://localhost:3000/api/cats로 이동하여 고양이에 대한 Swagger UI를 확인하세요:
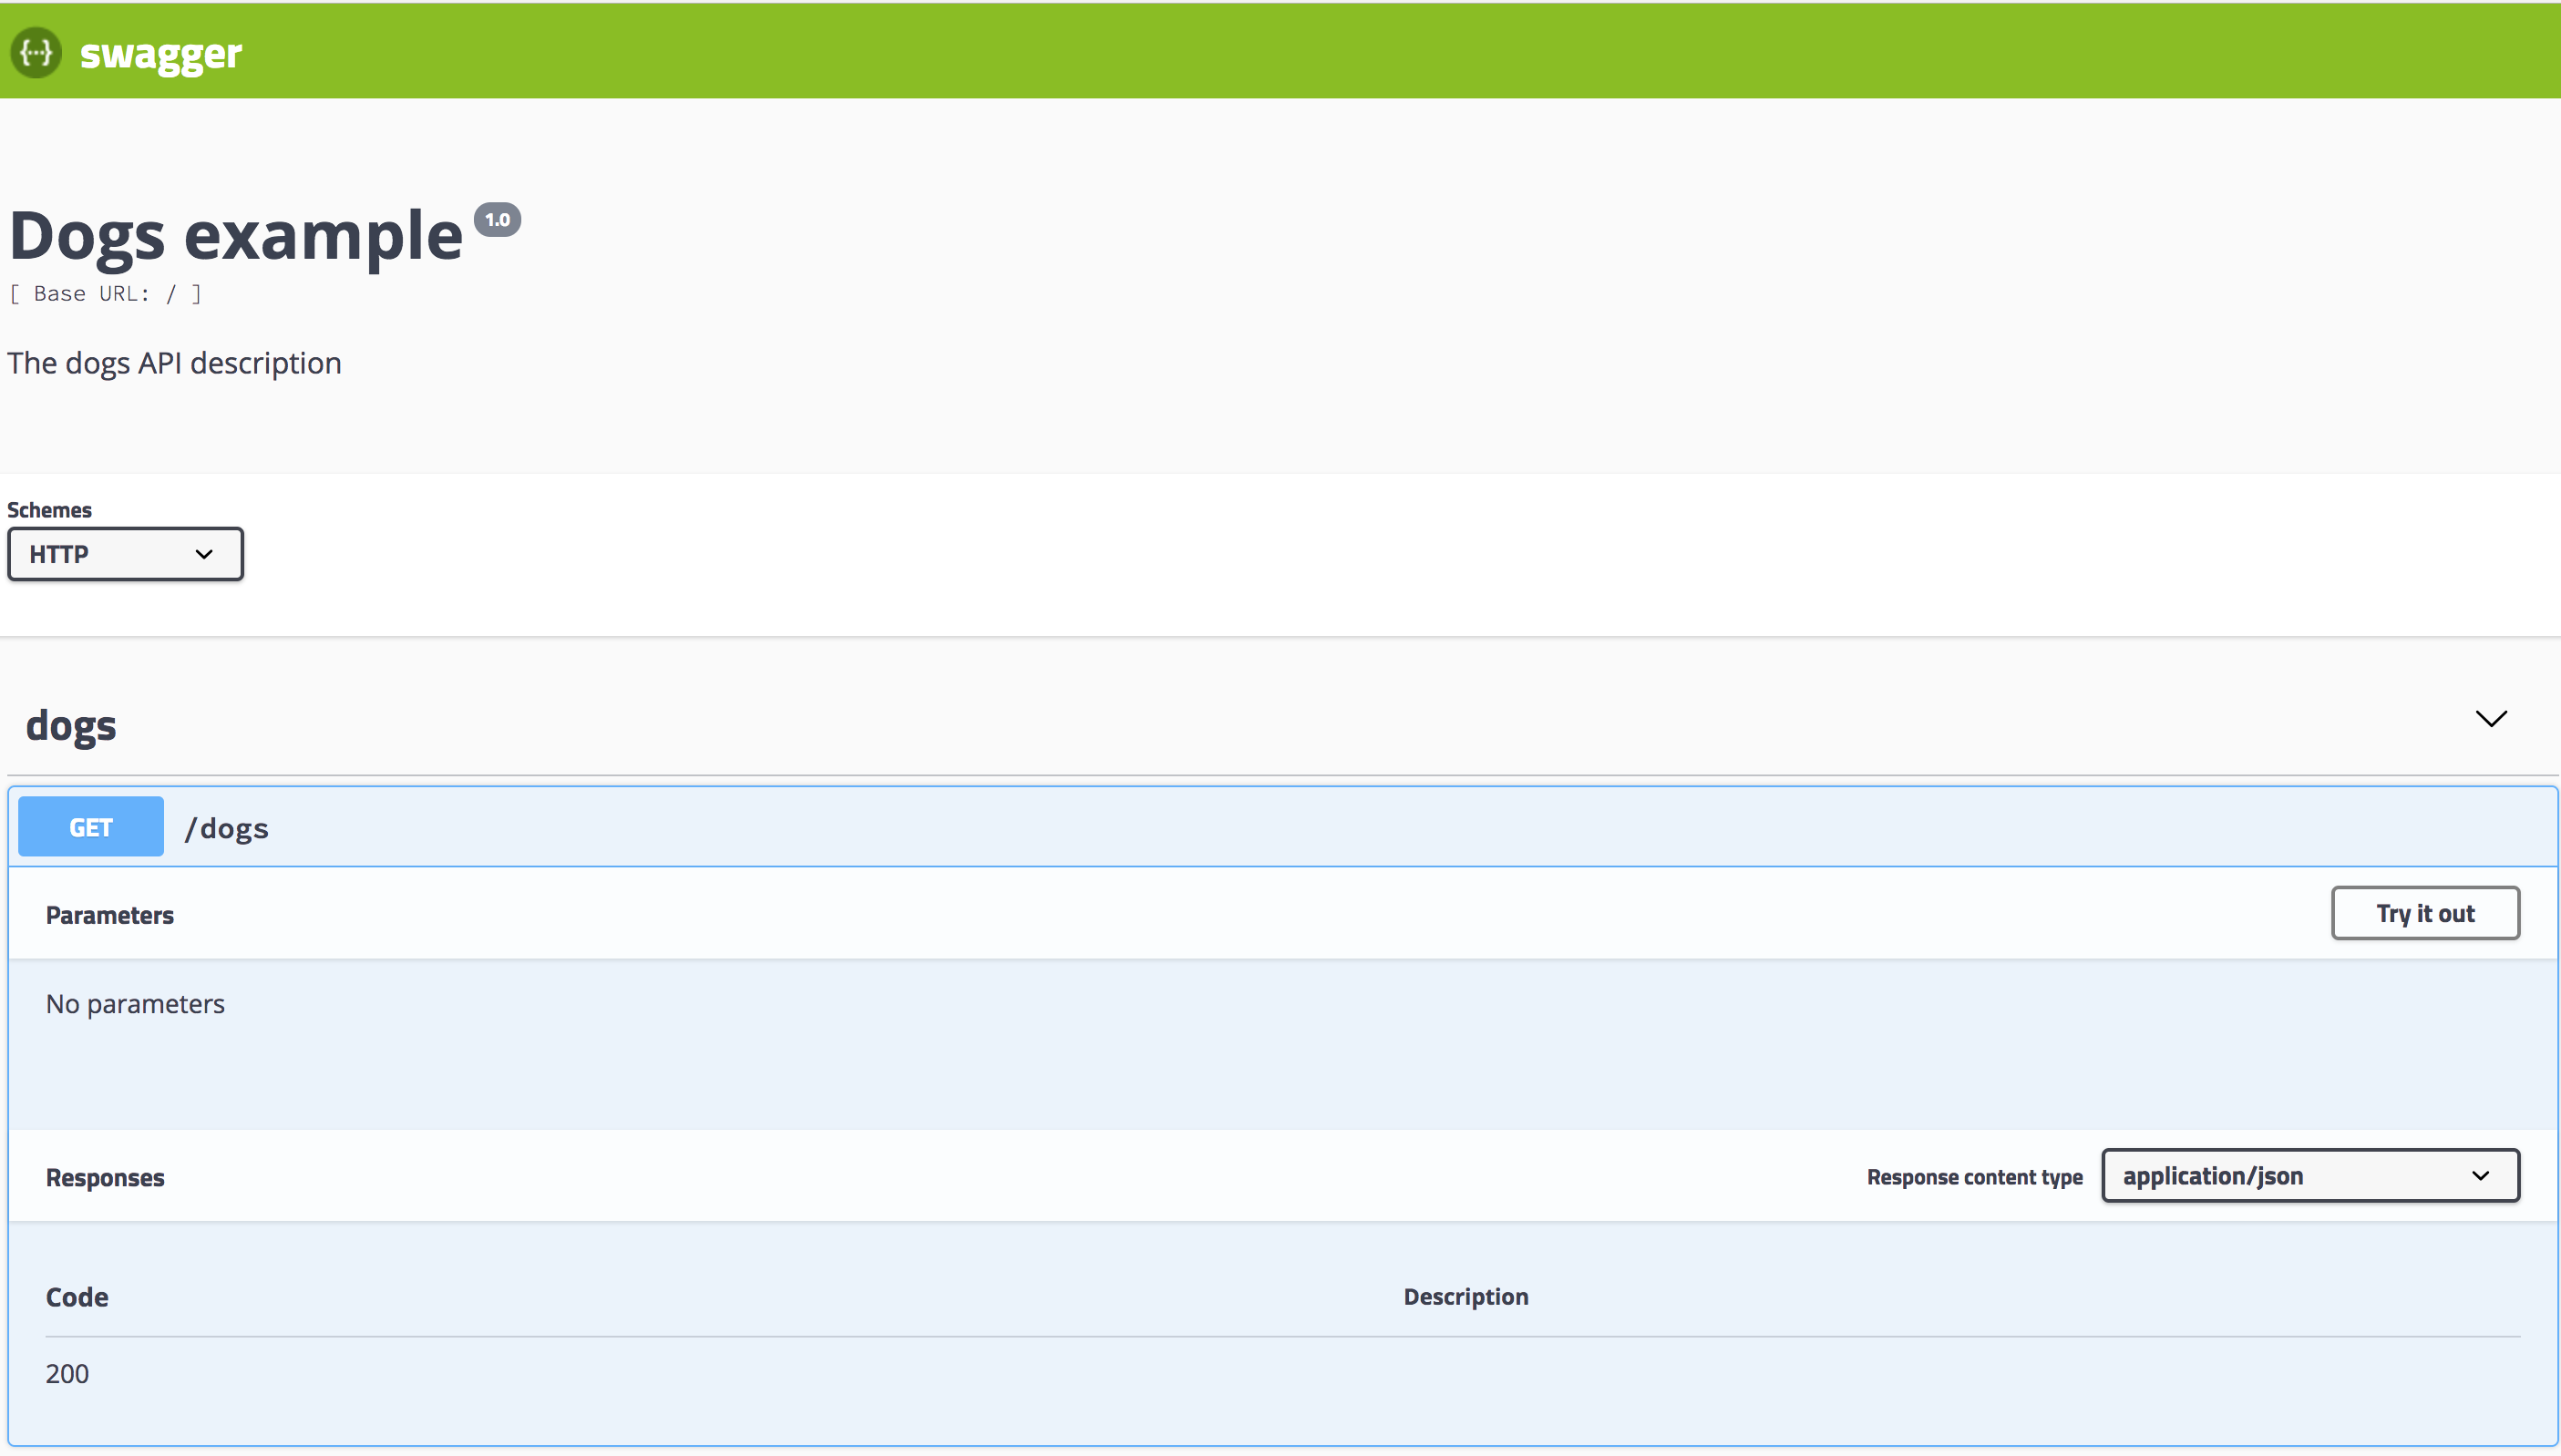
마찬가지로, http://localhost:3000/api/dogs는 개에 대한 Swagger UI를 노출합니다:
익스플로러 바의 드롭다운 메뉴#
익스플로러 바의 드롭다운 메뉴에서 다중 스펙 지원을 활성화하려면 explorer: true를 설정하고 SwaggerCustomOptions에 swaggerOptions.urls를 구성해야 합니다.
힌트swaggerOptions.urls가 Swagger 문서의 JSON 형식을 가리키는지 확인하세요! JSON 문서를 지정하려면SwaggerCustomOptions내에서jsonDocumentUrl을 사용하세요. 더 많은 설정 옵션은 여기를 확인하세요.
익스플로러 바의 드롭다운에서 다중 스펙을 설정하는 방법은 다음과 같습니다:
import { NestFactory } from '@nestjs/core';
import { SwaggerModule, DocumentBuilder } from '@nestjs/swagger';
import { AppModule } from './app.module';
import { CatsModule } from './cats/cats.module';
import { DogsModule } from './dogs/dogs.module';

async function bootstrap() {
  const app = await NestFactory.create(AppModule);

  // 메인 API 옵션
  const options = new DocumentBuilder()
    .setTitle('Multiple Specifications Example')
    .setDescription('Description for multiple specifications')
    .setVersion('1.0')
    .build();

  // 메인 API 문서 생성
  const document = SwaggerModule.createDocument(app, options);

  // 드롭다운 지원을 포함한 메인 API Swagger UI 설정
  SwaggerModule.setup('api', app, document, {
    explorer: true,
    swaggerOptions: {
      urls: [
        {
          name: '1. API',
          url: 'api/swagger.json',
        },
        {
          name: '2. Cats API',
          url: 'api/cats/swagger.json',
        },
        {
          name: '3. Dogs API',
          url: 'api/dogs/swagger.json',
        },
      ],
    },
    jsonDocumentUrl: '/api/swagger.json',
  });

  // 고양이 API 옵션
  const catOptions = new DocumentBuilder()
    .setTitle('Cats Example')
    .setDescription('Description for the Cats API')
    .setVersion('1.0')
    .addTag('cats')
    .build();

  // 고양이 API 문서 생성
  const catDocument = SwaggerModule.createDocument(app, catOptions, {
    include: [CatsModule],
  });

  // 고양이 API Swagger UI 설정
  SwaggerModule.setup('api/cats', app, catDocument, {
    jsonDocumentUrl: '/api/cats/swagger.json',
  });

  // 개 API 옵션
  const dogOptions = new DocumentBuilder()
    .setTitle('Dogs Example')
    .setDescription('Description for the Dogs API')
    .setVersion('1.0')
    .addTag('dogs')
    .build();

  // 개 API 문서 생성
  const dogDocument = SwaggerModule.createDocument(app, dogOptions, {
    include: [DogsModule],
  });

  // 개 API Swagger UI 설정
  SwaggerModule.setup('api/dogs', app, dogDocument, {
    jsonDocumentUrl: '/api/dogs/swagger.json',
  });

  await app.listen(3000);
}

bootstrap();
이 예시에서는 메인 API와 함께 고양이 및 개를 위한 별도의 스펙을 설정했으며, 각 스펙은 익스플로러 바의 드롭다운에서 접근할 수 있습니다.
